Friday, January 2, 2015

USB Charger Lamp


Behold, the multipurpose USB Charger lamp!

USB Charger lamp - heatherq.com


I've been slowly gathering the parts for this lamp for a while. I'm really into how it came together. It took a bunch of tries but ultimately I figured it all out. There might have been a bit of a mess in the meantime, but it all worked in the end.


The most important parts for this project are USB receptacle and the 3 wire cord. I found them at my local hardware store and they are available on Amazon as well. It's important to use the right USB receptacle for this lamp, if you are going to charge smart things with it (iphone, ipad, smart phones, etc). Some of them are the wrong amperage and can damage your device or just not work at all. 


If you aren't comfortable with wiring, this might not be a good first-electrical-project, but it's a really fun one if you are familiar with wiring.

Here is the basic diagram for a lamp with a USB changer, plug and light switch. In this lamp, the switch only turns the light off and on, the USB and plug are always powered. Be sure to use a single pole switch.

USB charger lamp - heatherq.com


Putting it all together looks like this awesome beasty.

USB charger lamp - heatherq.com


Monday, December 29, 2014

Vegan Lasagna Rolls

New stove! - heatherq.com


We got a new stove! It’s been a long time coming. We went over to our local appliance store and picked up a Whirlpool range. We’re very pleased. But before it went away, we celebrated the old range's last day on earth. We made one of our favorites. Lasagna Rolls! There’s something about lasagna in roll form that makes it even better.

We always make too much for 2 people so that we can enjoy the leftovers for a few days. This recipe keeps and reheats extremely well.

Vegan Lasagna Rolls - heatherq.com

Witness, the great rolling of the rolls.

Vegan Lasagna Rolls - heatherq.com
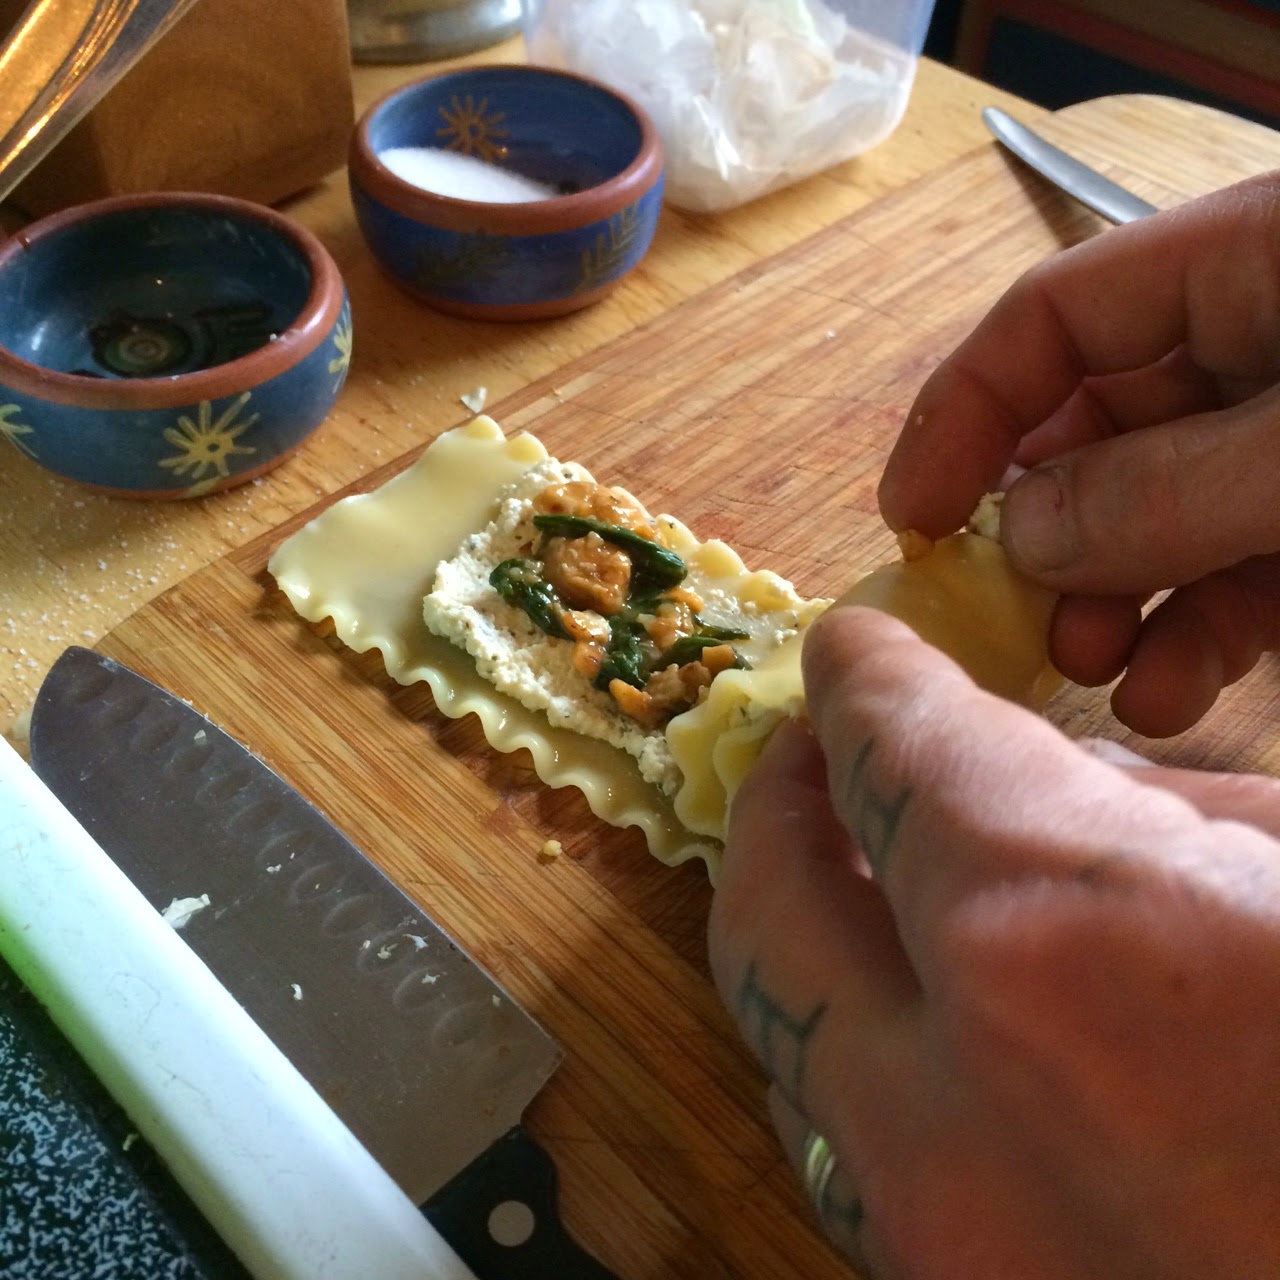
Layout the lasagna roll and top first with cheese, then tempe/spinach filling

Vegan Lasagna Rolls - heatherq.com
Roll 'em up

Vegan Lasagna Rolls - heatherq.com
Place end up in a pan

Vegan Lasagna Rolls - heatherq.com
Top with sauce and vegan cheese

Vegan Lasagna Rolls - heatherq.com
Bake for 25 mins and make dog super jealous

Vegan Lasagna Rolls - heatherq.com
Serve

Vegan Lasagna Rolls:

Ingredients:
15 lasagna noodles, cooked
2 cups Red sauce of choice
Diaya mozzarella shreads (or other vegan cheese)
Tofu Ricotta Cheese
          Block of Tofu
          1 tsp dried basil
          1 Tbl Nutritional yeast
          1 Tbl Olive Oil
          2 tsp apple cider or white Vinegar
          1 tsp salt
          1 tsp powdered garlic
          1 tsp powdered onion
Filling
          2 Tbl olive oil
          1 medium onion, diced
          1 block tempe, crumbled
          2 Tbl Braggs liquid aminos
          1 tsp Garlic powder
          1 bunch spinach (washed and chopped)

Directions:
Boil the water, heavily salted, for the lasagna. While the water is heating up, work on the tofu ricotta. Put all of the “Tofu Ricotta Cheese” ingredients in a food processor and blend until smooth. Set aside.

Keep an eye on your lasagna noodles as not to overcook.

In a large skillet, heat oil and sauté onions until they begin to turn translucent. Add tempe, Braggs and garlic powder. Sauté for about 8 minutes. Add spinach handful by handful, covering for a bit, then stirring it in as it starts to wilt. Remove from heat.

Pre-heat oven to 385 degrees and start to roll the lasagna! Now it’s assembly time! Put a layer of red sauce in the bottom of a 8x10” pan. Lay out a lasagna noodle on a cutting board and put a thin coat of Tofu Ricotta on it. Spread a couple spoonfuls of topping on top of the ricotta. Roll up the lasagna noodle. Place standing up in pan. Repeat until all noodles are rolled.

When all the rolls are rolled up, cover tops with a sprinkle of cheese, then a layer of red sauce and another sprinkle of cheese.


Bake for 25 minutes. Then broil for 4 minutes to crisp slightly.

Makes 15 rolls. Serves 2 people for several days... or 6-7 people for a lovely dinner party

Saturday, December 27, 2014

Vegan Volcano Biscuits

Vegan Volcano Biscuits - heatherq.com


These biscuits have a warm jam topping that melts down the side of the biscuit when cooked. The lava flow of jam is the hallmark of my volcano biscuits. And let’s be real, it’s fun to wake up and ask “Do you want volcanos?”

Dough:
2 cups flour
2 Tbl sugar
½ tsp salt
1 Tbl baking powder
1 Tbl ground flax seed (I just grind it up in a coffee grinder) – you can also sub 1 T dry egg replacer
1/3 cup light veggie oil
1/3 cup rice or soy (or whatever fake) milk
½ cup water
1 tsp apple cider vinegar (white vinegar also works)
6 Tbl of your fave jam
1 additional Tbl of sugar for dusting

Heat oven to 385 degrees.

In a medium mixing bowl, combine all the dry ingredients. In a small bowl, combine all of the wet ingredients. Make a well in the middle of the dry ingredients and pour in the wet, then fold wet and dry together.

Make 6 balls out of the dough and put them on the baking sheet. Press down on the dough balls, making them into a sort of nest shape – this usually involves flattening the dough out a bit, and then pushing down a little extra in the middle of each one. Top each with 1 T of jam. Dust dough with remaining Tbl of sugar. Bake for ~18-20 minutes.

Makes 6


Tuesday, December 23, 2014

Fig Puffs

I love figs. I love figs to a level that is a little frightening. We have a gorgeous fig tree in our back yard and I really like making these crispy, flakey, attractive Fig Puffs as soon as they start to ripen. They are so delightfully easy.  


Fig Puffs - heatherq.com

To make them, you need:
1 package frozen Puff Pastry
3 Tbl white or raw sugar (divided)
3 Tbl brown sugar
3 ripe (soft but not super soft) green or black figs - I use green

Directions:
Remove frozen puff pastry from the freezer about an hour before you start the rest of the recipe. 

Preheat oven to 400 degrees. Combine both sugars in a small bowl, keeping 1 Tbl of white/raw sugar set aside. Open the puff pastry and unfold it flat on a baking sheet. Cut the puff pastry in 6 equal parts (I usually follow the seams and then slice the long pieces in half). Sprinkle puff pastry with white/raw sugar 

Prepare figs by slicing off stem and bottom. Slice fig into 1/8th inch slices. Arrange in a row on the pieces of puff pastry. Sprinkle each piece with the sugar mixture. 

Fig Puffs - heatherq.com

Back until golden brown and delicious looking (about 15 minutes) - Remove from oven and enjoy!

Fig Puffs - heatherq.com


Sunday, December 21, 2014

Persimmons and Home Canning Basics

I have the pleasure of working with the Portland Fruit TreeProject throughout the year. They are a great organization, which organizes harvest parties for the large amount of fruit trees in Portland. Groups of volunteers harvest ripe fruit and a portion is donated to the Oregon Food Bank. Volunteers also take home a portion of the fruit, as does the owner of the property/fruit trees. On top of the harvest parties, they also organize canning and cooking classes to help people with ideas on what to do with… we’ll say 30+ pounds of Persimmons, for instance.

Persimmons!

Enter Heather and Jason! We joined with the PFTP to teach a Persimmon Preservation class. We did a demo of one of my favorite persimmon recipes, Persimmon Chutney. It makes a great addition to a holiday gift basket and goes well on all sort of things. Jason prefers it on pork while I prefer it on a nice curry… or a spoon.

To help with the class, I put together a handout. Who doesn’t like a good handout? It includes three persimmon recipes as well as a basic guide to home canning. Credit where it is due, the basic guide came directly from My Pantry Shelf. It is incredibly well written and a great guide.

The three recipes are:
Persimmon Chutney
Persimmon Jam
Persimmon Cookies

Granted, persimmon cookies aren’t a canning thing, but it you have persimmons, you should 100% make these cookies. They are soft and chewy. On top of that, the bizarre science experiment that is persimmon and baking soda brings me a weird level of joy.


Wednesday, July 16, 2014

Creamy Peach Mango Popsicles - Pinterest Battle, week 2

In celebration of the heatwave that Portland has been sitting in for the past week, I decided to break in my growing collection of popsicle molds! I've been eyeing a bunch of fancy recipes on Pinterest, along with all things summer. My creation is a delightfully cool and creamy (vegan) peach mango number.

Vegan Yogurt Peach Mango Popsicle - heatherq.com

Creamy Peach Mango Popsicles
Ingredients:
2 8oz containers of coconut milk yogurt - vanilla flavor (I used SoDelicious brand. I heart it)
1 bottle of R.W. Knudsen Mango Peach juice

Directions:
Put about 2 spoonfuls of yogurt into each popsicle mold. Hold at angle and lightly bang it on counter, so that it all goes to one side. Place in freezer for about 2 hours. Remove from freezer and fill the remaining space with juice. Put sticks/tops on popsicle mold and pop back in freezer for 4 hours or more. Enjoy!

Makes 8 popsicles


Vegan Yogurt Peach Mango Popsicle - heatherq.com
This is enjoyment.


Monday, July 14, 2014